Knitting How To Make A Slip Knot
Knitting How To Make A Slip Knot - Web learn how to tie a slip knot in just 5 easy steps. The knot can be used as temporary stopper knot. Use your other hand to pinch the yarn as well so that you have a section in the middle that measures 2”. The top loop and bottom loop form a “v” shape on the front side of the chain. Grab the working yarn inside the loop with your thumb and your index finger. Web insert one of your working needles through the two loops of yarn like this: In this knitting 101 tutorial, we’ll show you how in just a few easy steps. Pinch the top of the “4” with your fingers. Secure the yarn between the ring and pinky finger. You can make it with just a single wrap as shown in the below video. Bring your hands together, crossing one hand over the other to form a loop. Web watch the video for the full explanation on how to tie a slip knot. Before casting onto a knitting needle, make a slip knot with these simple instructions. Learning how to tie a slip knot is one of the most important knots to know. Grab. Once you’ve got the hang of the slip knot, you’re ready to start knitting or crocheting! Web watch the video for the full explanation on how to tie a slip knot. Make a slip knot by making a loop and pulling the long end of your. Pinch the top of the “4” with your fingers. Web learn how to tie. Web watch the video for the full explanation on how to tie a slip knot. Learning how to tie a slip knot is one of the most important knots to know. Web learn how to tie a slip knot in just 5 easy steps. Use your other hand to pinch the yarn as well so that you have a section. You’ll be tying slip knots in no time! Making a slip knot is the first step to starting most knitting projects. Making bracelets (like friendship bracelets, macramé and hemp bracelets, etc.), necklaces, jewelry closures, yoyos. 122k views 9 years ago quick knits. In this knitting 101 tutorial, we’ll show you how in just a few easy steps. Take the tail end that is not connected to the yarn ball, and make the shape of a “4”. Top loop, bottom loop, and back ridge loop. Web tuck the bend through the loop and pull it tight. Web how to make a slip knot: Web so, how do you make a slip knot? In this video, jen lucas demonstrates how to create a simple slip knot. Knitting needle, crochet hook, your finger etc. Make a loop with the tail end of the yarn under the working yarn (yarn attached to the ball of yarn). Make a slip knot by making a loop and pulling the long end of your. As a starting point. Web watch the video for the full explanation on how to tie a slip knot. Tuck the bight through the loop and tighten. Make a circle with yarn or thread. Insert the needle into the loop. Making bracelets (like friendship bracelets, macramé and hemp bracelets, etc.), necklaces, jewelry closures, yoyos. Make a loop with the tail end of the yarn under the working yarn (yarn attached to the ball of yarn). Create a loop with yarn. Pull on the loop to tighten the knot. Use your thumb and index finger to go in the loop from front to back. You’ll find tutorials and guides for making a slipknot, cast on,. Web a slip knot is the starting point for just about everything you'll do in knitting. These techniques form a sturdy. This knitting tutorial will show you the how to make a slip knot to get started for your knitting. Tuck the bight through the loop and tighten. Alternatively, here’s an excellent how to make a slip knot knitting video. Web red heart yarns. Wrap the yarn around your pinky finger & bring the yarn across the back of your hand. Grab the working yarn inside the loop with your thumb and your index finger. Alternatively, here’s an excellent how to make a slip knot knitting video tutorial by davina from sheep & stitch on youtube. You’ll find tutorials and. You’ll be tying slip knots in no time! The slip knot is created and then the rest of the stitches are cast on and you’re ready to begin knitting. Ch 2 (does not count as a stitch), * work a cluster st into next chain space (between puff stitches), ch 1* repeat * to * around, sl st to top of 1st cluster stitch. You should have 16 cluster stitches. Make a slip knot by making a loop and pulling the long end of your. This knot variation allows you to quickly loosen the finished loop or tighten it back up when pulling on one strand. Once you’ve got the hang of the slip knot, you’re ready to start knitting or crocheting! Create a loop with yarn. Making bracelets (like friendship bracelets, macramé and hemp bracelets, etc.), necklaces, jewelry closures, yoyos. Create a loop around your thumb clockwise. The back ridge loop is the loop in the middle of the stitch on the back side of the chain. Lift the loop over the working yarn. Web the beginning chain has three loops: 476k views 10 years ago knitting lessons with studio knit. You can make it with just a single wrap as shown in the below video. The working yarn (the one connected to the yarn ball) should be on top of the tail end.
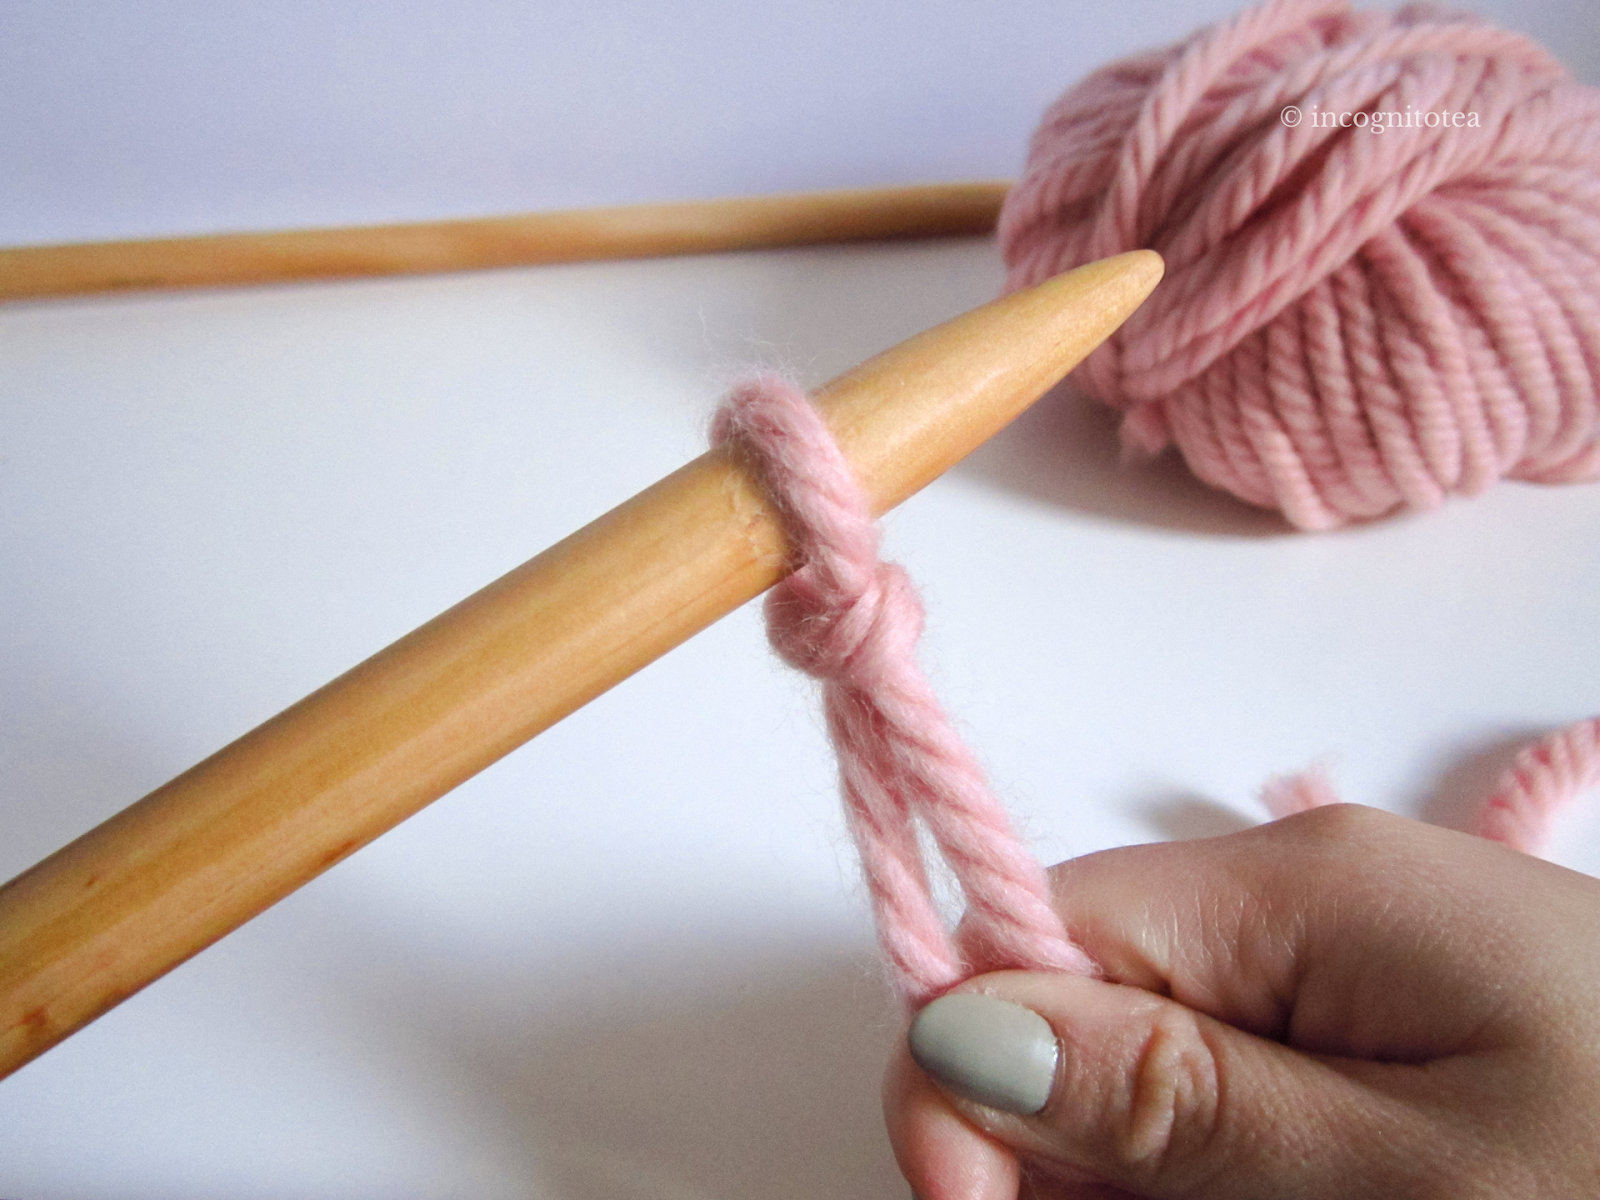
How to tie a slip knot Step by step tutorial for knitting beginners

How to Make a Slip Knot Beginner Knitting Teach Video 1 YouTube

How To Make The Easiest Slip Knot For Knitting! The Crafty World

Creating a slip knot is the first step to begin knitting. A knot is
Knitting Basics How to make a slip knot
The Complete Beginners Guide to Knitting eKnitting

Knitting 101 How to Make a Slip Knot Knitfarious
The Complete Beginners Guide to Knitting eKnitting

How to tie a slip knot Step by step tutorial for knitting beginners

Knitting 101 How to Make a Slip Knot Knitfarious
In This Video, Jen Lucas Demonstrates How To Create A Simple Slip Knot.
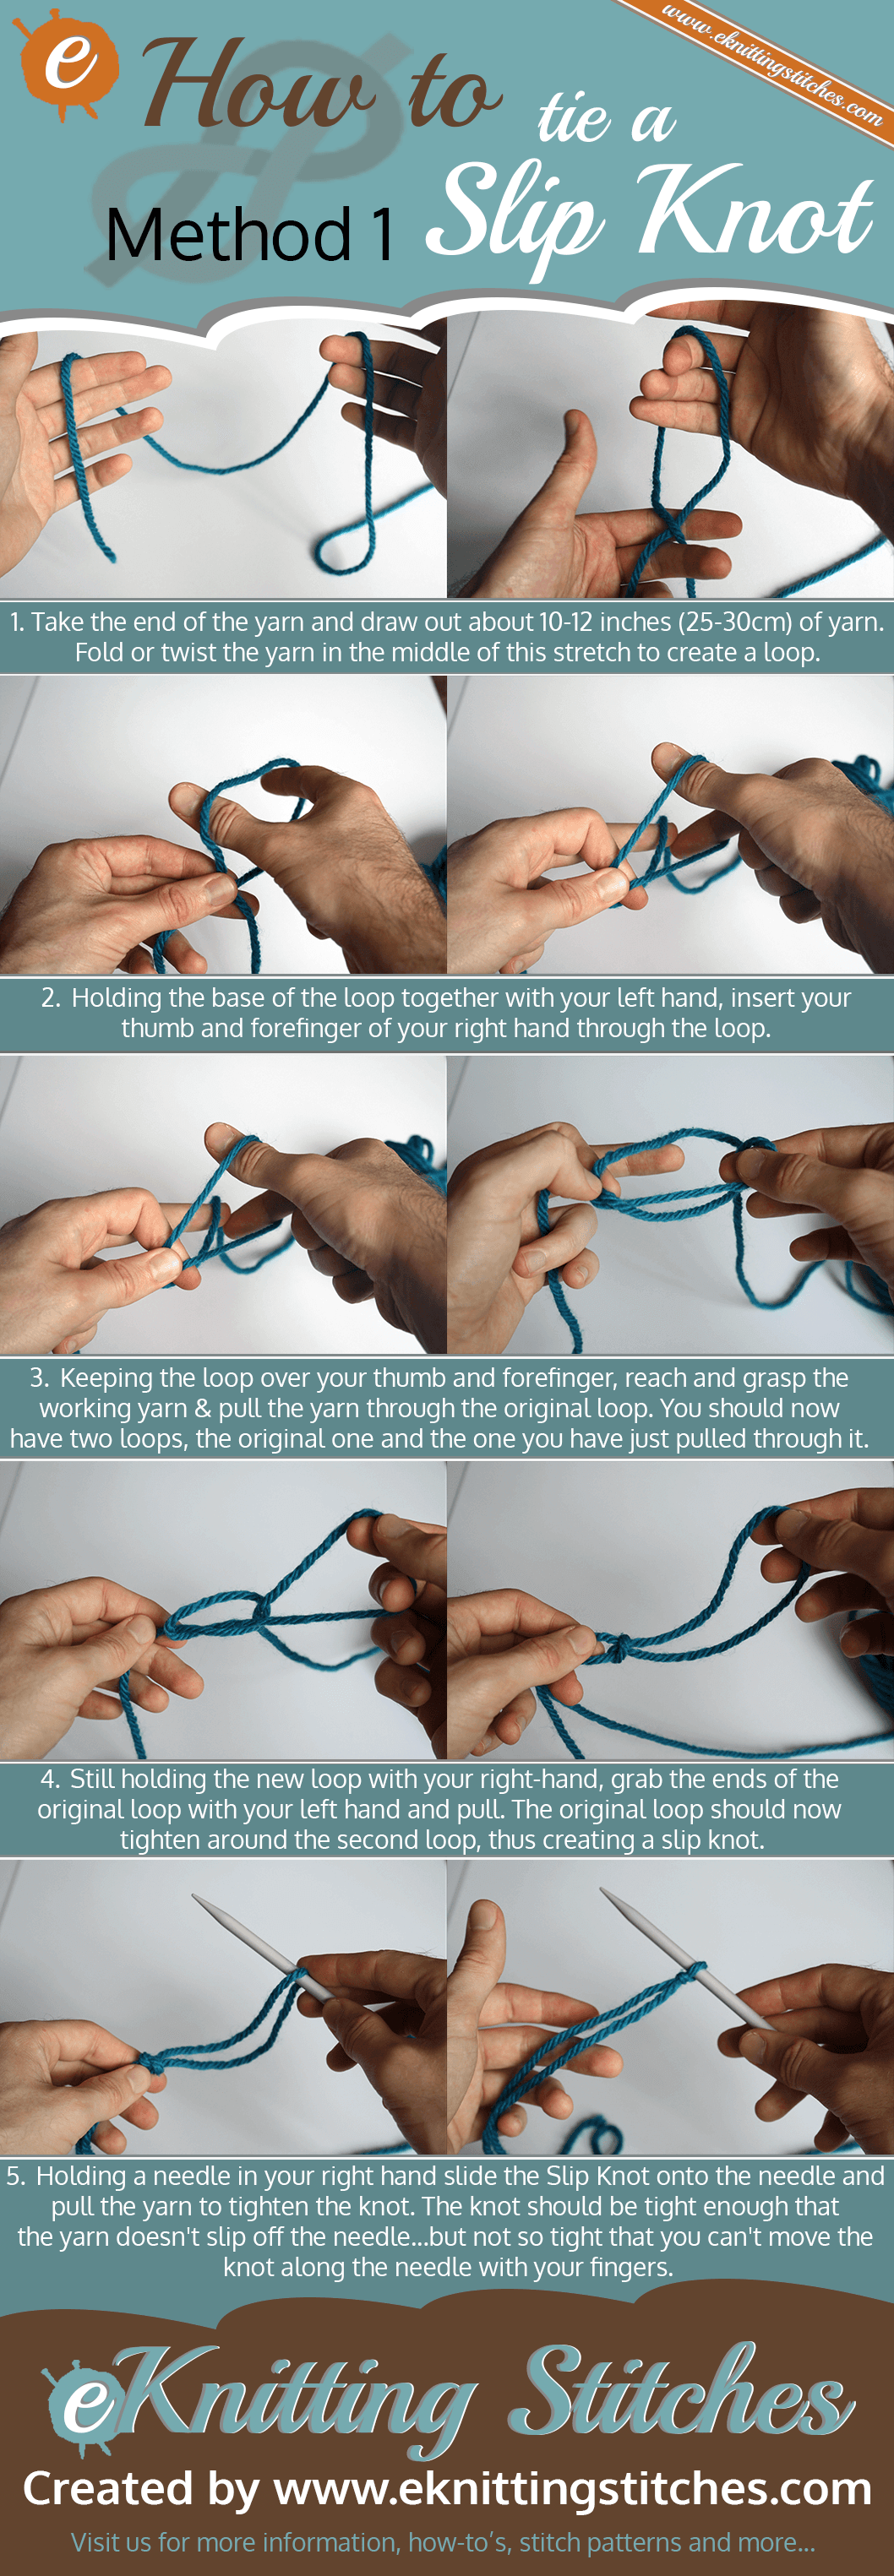
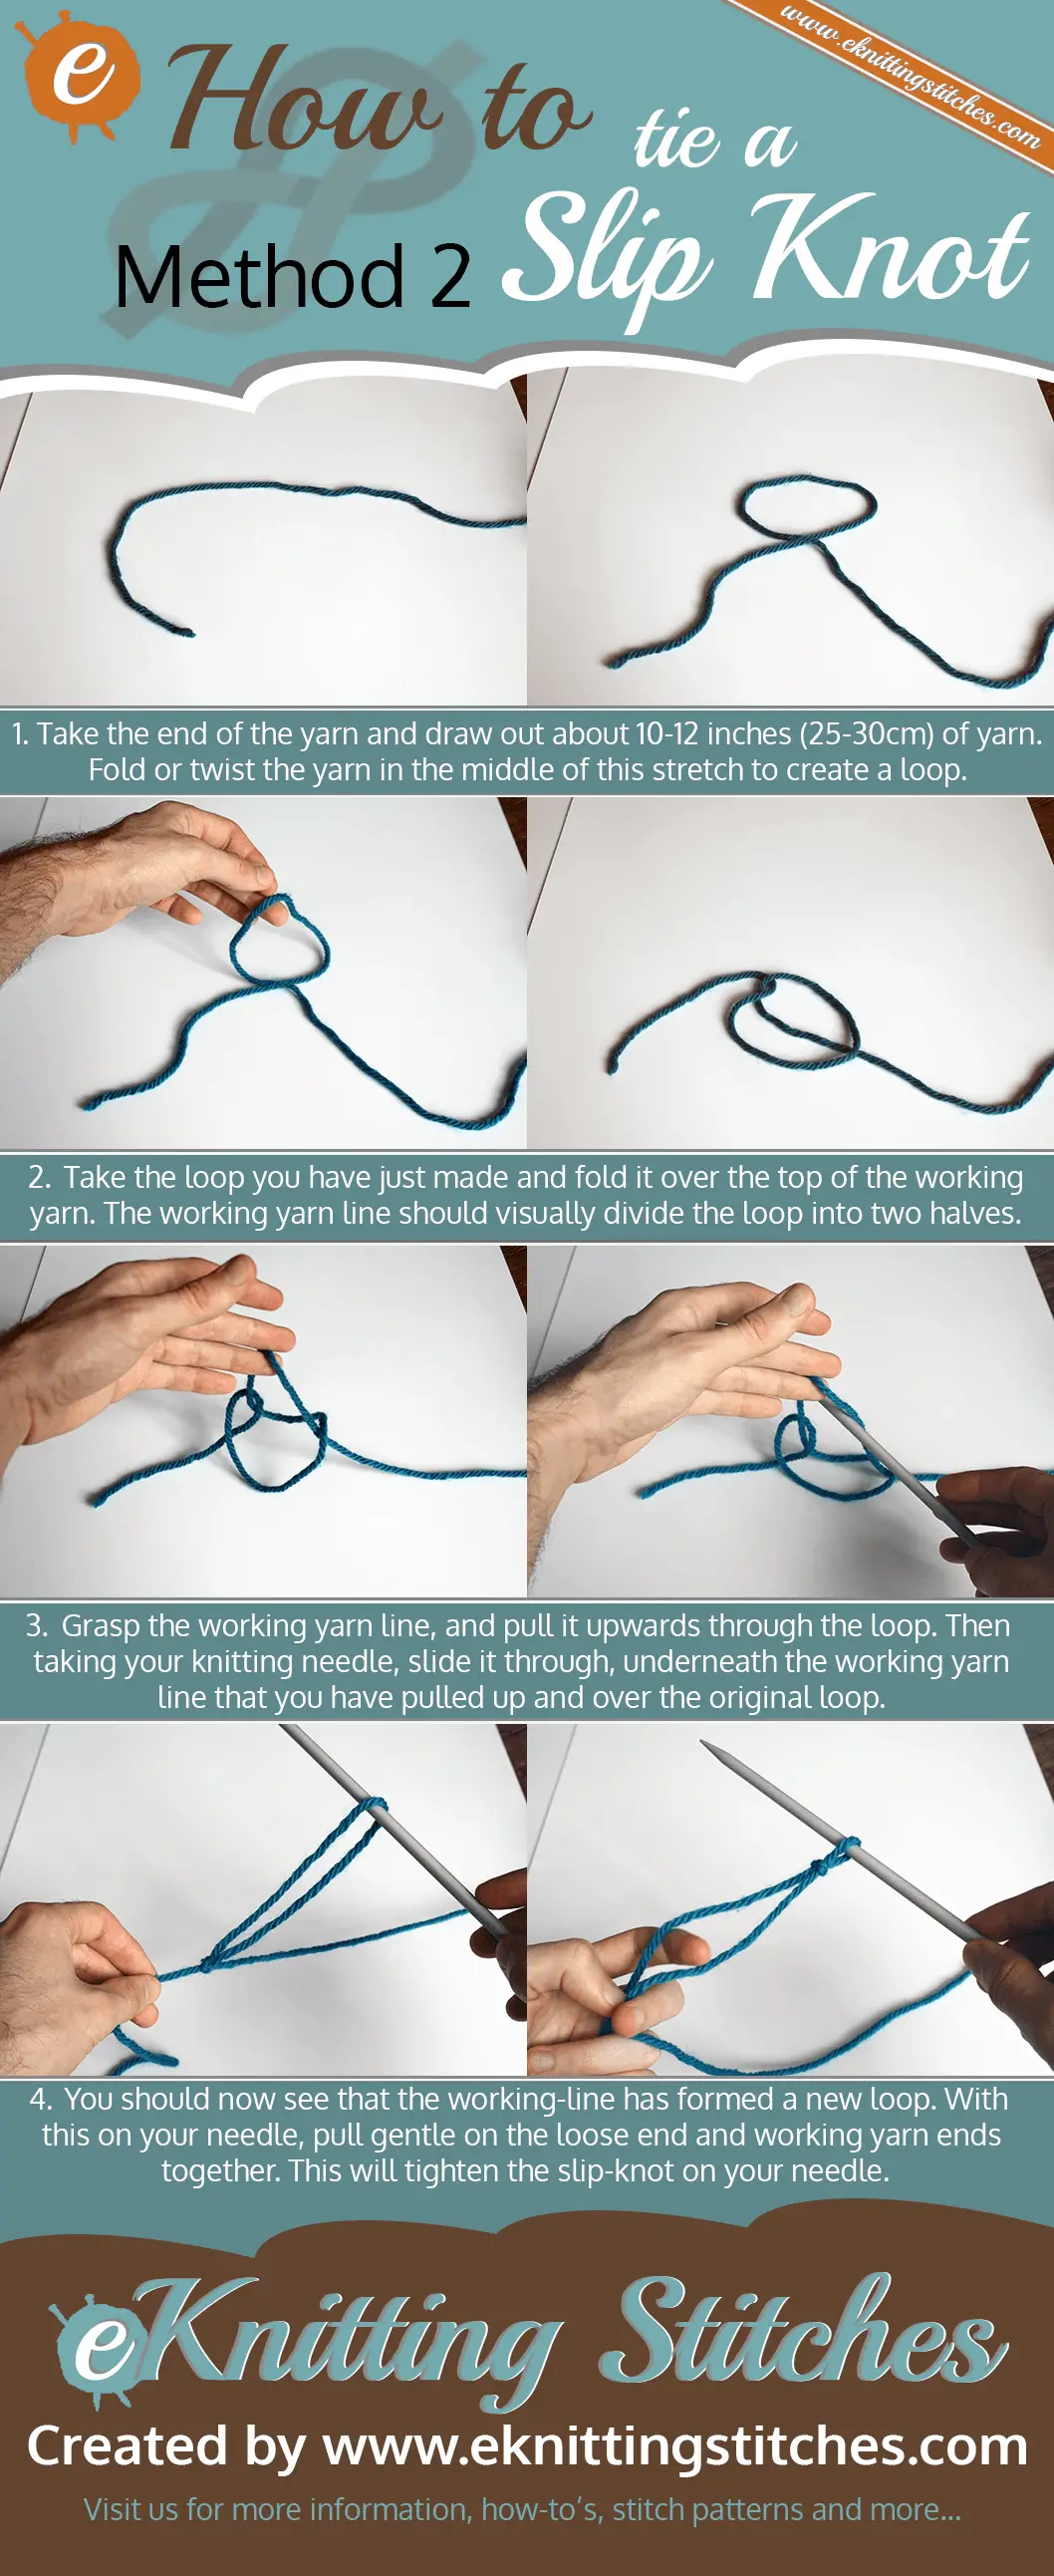
Make A Loop With The Tail End Of The Yarn Under The Working Yarn (Yarn Attached To The Ball Of Yarn).
Pulling About A 10″ Length Of Yarn From The Ball, Measure 8″ Down And Use One Hand To Pinch The Strand.
Web Learn How To Tie A Slip Knot In Just 5 Easy Steps.
Related Post: